DAKOTA DESIGNS - Gourmet Fiber Arts
  • Home
  • Shop News
  • Online Store
  • Shipping
  • Sheepskin
  • Spin!
    • Spinning Videos
  • Contact
  • Blog
  • Subscribe

And Then FATE Steps in ...

4/12/2020

0 Comments

 
On the very day I realized that I had been obsessively STUCK in the bad news cycle, a gift came to me. What follows is what I received via email and I need to pass it on to you and as many others as I can.

A Message from White Eagle, an Indigenous Hopi Woman on 03/16/2020

Picture

VISION QUEST

“This moment humanity is going through can now be seen as a portal and as a hole.
The decision to fall into the hole or go through the portal is up to you.

If you repent of the problem and consume the news 24 hours a day, with little energy, nervous all the time, with pessimism, you will fall into the hole. But if you take this opportunity to look at yourself, rethink life and death, take care of yourself and others, you will cross the portal.

Take care of your homes, take care of your body. Connect with your spiritual House.
When you are taking care of yourselves, you are taking care of everything else. Do not lose the spiritual dimension of this crisis, have the eagle aspect, that from above, and see the whole; see more broadly.

There is a social demand in this crisis, but there is also a spiritual demand. The two go hand in hand. Without the social dimension, we fall into fanaticism. But without the spiritual dimension, we fall into pessimism and lack of meaning.

You were prepared to go through this crisis. Take your toolbox and use all the tools available to you.
Learn about resistance of the indigenous and African peoples: we have always been and continue to be exterminated. But we still haven’t stopped singing, dancing, lighting a fire and having fun. Don’t feel guilty about being happy during this difficult time.

You do not help at all being sad and without energy. You help if good things emanate from the Universe now. It is through joy that one resists. Also, when the storm passes, each of you will be very important in the reconstruction of this new world.

You need to be well and strong. And, for that, there is no other way than to maintain a beautiful, happy and bright vibration. This has nothing to do with alienation.

This is a resistance strategy. In shamanism, there is a rite of passage called the quest for vision. You spend a few days alone in the forest, without water, without food, without protection. When you cross this portal, you get a new vision of the world, because you have faced your fears, your difficulties …

This is what is asked of you:
Allow yourself to take advantage of this time to perform your vision seeking rituals. What world do you want to build for you? For now, this is what you can do: serenity in the storm. Calm down, pray every day. Establish a routine to meet the sacred every day.

Good things emanate; what you emanate now is the most important thing. And sing, dance, resist through art, joy, faith and love. ”
​
Resist – Be reborn
0 Comments

It's a Ply World After All ...

3/4/2020

0 Comments

 
Picture
It’s a ply, ply world.  2020 will be my year to be all about Ply Magazine.  I was fortunate to have 2 great ideas for the Summer and the Autumn editions of Ply Magazine, and had them accepted for publication.  I also applied to be a vendor at Ply Away V, and was also accepted.  All of this is such a blessing and so exciting. 
 
I have been blogging off and on for several years, but I really wanted to write an article for a spinning magazine.  I really like the way Ply does it, they  have a “mood board”.  Each issue is based on a theme – or mood, and they ask for input from you and me as to articles that we might want to write for that theme. 
 
I have been involved with fiber since I was a little girl.  My mother taught me to knit and to sew and I was hooked for life.  I have sewn three wedding dresses, my own and both of my son’s brides.  I made all the baby clothes for my two boys.  I have knit for everyone in the family, including myself, from socks to sweaters.  At the age of 20, I saw a woman spinning wool on her Ashford spinning wheel – when I found out how LITTLE a fleece cost compared to spun yarn – hooked again!  I knew I could learn to spin and it would save me a fortune in wool yarn AND it did, but I spent another fortune in spinning wheels and spinning related equipment over the years.  Ah well, what does it matter???  Life is about living, and living is about being creative and feeding your soul.  I have a well fed soul.

When I saw the email from Ply about their Summer edition theme on support spindles, I could not resist.  18 months before, I had begun a grand passion for support spindles, and I had one or two things to say about what I could create with them.  Once I was accepted as an author for this edition, I started thinking about the fiber I would use to illustrate the content of my article.  I would need fiber that was NOT easy to use to achieve the goal, some that was Good, but not perfect, and then the PERFECT fiber.  I set out to find the three contestants and settled on Into the Whirled Polworth/silk, Inglenook naturally dyed batts, and Miss Babs Merino/Silk.  I spun and spun, all Summer long, then wrote my article and sent it off, along with a bevy of pictures. 
​Then Ply sent out another Mood Board email – this time for their Fall Back To Basics edition.  They included Dyeing as one of the possible themes.  Woo Hoo,  I like to dye and I think about how dyeing affects yarn, roving and fleece.  Another article idea was born.  Once again, I had to think about setting up my article with samples to illustrate my take on dyeing from a spinner’s perspective.  This time it was easier to prepare the samples for the article, and for 5 days my kitchen was a dye-o-rama, but I have an understanding partner, so all was well! 
Picture
​Writing for Ply has been a blast and I can’t wait to buy a box of copies to share with my friends and family.  Getting accepted to be a vendor at Ply Away V was icing on a very yummy cake.  I am bringing all of my normal stuff;  Cozy Feet Treadle covers, Stansborough Grey fiber, MANY other nice fibers – washed and ready to prep and a few special items, some woven, some sewn, some imported.  It should be a really fun time and I can’t WAIT.
0 Comments

Why I LOVE Jacob

9/8/2019

0 Comments


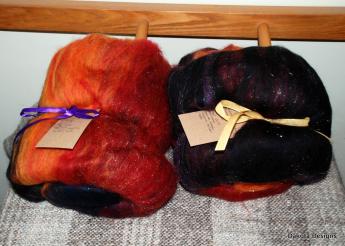
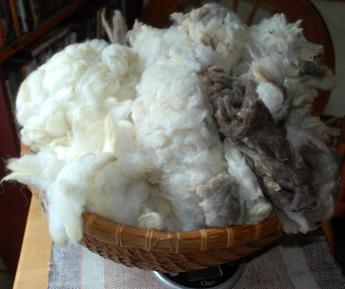
​I do love to spin Jacob wool.  

For me, it is one of those comfort activities.  Jacob just makes me feel good.  A fire in the wood stove, a cup of Hot Chocolate and some Carded Jacob is my idea of a relaxing way to spend the day! The fiber is springy, not TOO kinky and drafts easily.  It is the kind of fleece that will please the beginner all the way through to the seasoned veteran. The yarn you get will make super outerwear, socks, shawls and a spectacular blanket (that's my current plan!). The yarn also has SPROING -- so it kinda snaps back -- like boing!

On Sale

On Sale

Jacob Finn Cross Carded Batts

Shop

Jacob Mixed Color Carded Batt

Sold out

Shop

On Sale

On Sale

Valhalla Acres Fiber Farm Roving, Am I Blue?

Shop

On Sale

On Sale

Valhalla Acres Fiber Farm Roving, Royal Purple

Shop

On Sale

On Sale

Valhalla Acres Fiber Farm Roving, Autumn Sunset

Shop

On Sale

On Sale

Jacob Mix #1

Shop

On Sale

On Sale

Jacob Mix #2

Shop

On Sale

On Sale

Jacob Mix #5

Shop

On Sale

On Sale

Jacob Fleece - White

Sold out

Shop

What makes a Jacob?

​Some of you are wondering, What is Jacob? Jacob is a polycerate (love that word) sheep.  That means they have MANY horns.  American Jacob differs greatly from British Jacob, where the breed originated. American Jacob are smaller.  Breeders don't coat them -- because of the many, REALLY curvy horns (the POLY from polycerate). Jacob has the greatest range of acceptable fiber than any other breed.  Since it is a conservative breed, there are many folks that have a small herd of Jacob.  Because of this, you may find quite a few farms with Jacob that produce wonderful fleece!

Jacob sheep produce multicolored fleece.  From white to nearly black.  As you move through the spectrum of color the fleece also gets shorter and softer from light to dark.  Working with a Jacob fleece is a delight for the senses!  

Some Jacobs and some Jacob Fleece

The Many Colors of Jacob's Coat

Picture
American Jacobs are smaller than their British cousins so if you want MORE of all the colors you can get several Jacob Fleece and sort them together.  I once sorted through 5 Jacob Fleeces, 

I like to separate my Jacob into piles.  I start by pulling out the pure white areas and the pure dark area -- these will be the two ends of my spectrum.  Then I look at what is left and start separating based on lighter vs darker. I don't pull away any of the bits of white clinging to the grey or the brown, but I might grade the pile as lighter gray and darker gray, depending on how much white I see mixed in. Often I have been able to get 5 shades of carded roving.  But 4 is good too.

Sorting

Sort Raw or sort Clean?  Well, it kinda depends!  If the fleece is really dirty (dirt type of dirty), then you should wash it first,  You'll have a hard time seeing the color valuations if it is all kinda coated with mud!  The white on a Jacob is usually BRIGHT -- so clean helps.

I have sorted both ways, raw and clean.  Clean smells better, but the fiber holds more tightly together and you have to do a little more pulling.  The advantage is that you can do it in the house and you can see the colors.  When washing first, Try to get 2 - 3 basic color areas and keep them together for later.  Wash each as a single "batch" .  You can see how I wash fleece by hand  by reading Washing Day -- it is not the MOST efficient method, but I get really good results and minimal lock damage. 

Sorting a Single Raw  Jacob Fleece -- 4 Shades

Sorting Multiple Washed Jacob Fleeces - 5 Shades

White - #1
Light Gray #2
Medium Gray #3
Dark Grey #4
Dark Brown #5

And then ... there is the Gourmet Jacob -- Lilac

Jacob sheep that are 60% white and 40% another color --  light gray or light brown -- are called "lilac" .  For these fleece you do not try to sort the colors, you  just wash, card and spin.  Your yarn will have a gentle, subtle Lilac hue.

​So far I have found Lilac Fleece to be a little softer.  I try to get Lilac fleece whenever I can!  It is such an adventure in spinning, and a treat for the eyes.
​
Lilac with Light Gray
Lilac with Light Brown

Try Jacob -- You Won't be Sorry

Jacob is a medium length fiber and comes in multiple shades and multiple degrees of softness.  It is fun and easy to spin.  It cards up quite easily, wether you are using hand cards or a drum carder -- I like the way it turns out with my Louet Jr. Drum carder.  You can comb Jacob -- but carding works just as well and it spins great from a carded bat.

When you work with Jacob, you are working with a little piece of history, a sheep breed that has not been "improved" -- it's just JACOB!
0 Comments

Weaving outside the lines

6/30/2019

0 Comments

 
Picture
​When looking at project drafts/projects we don’t always want to do it exactly as written. Maybe we want to substitute a different weight warp, or add a feature, or try out a new selvedge scheme. Weaving is not like coloring — it is permissible, and often desirable to “color” outside the lines!
I had two projects in mind, which needed some changes.

​Project #1 Spinning Lap Towels

The first was a project from Handwoven Design Collection 18 – A Lap Towel for Spinning. Here is their description:
“This towel is really a sort of lap rug for spinners. It’s designed to keep fuzz off your good slacks — or jeans! Wear it light side up when spinning dark fiber and dark side up when spinning light fiber, and it will also help you see what you’re doing. The little pockets are handy for oil cans, threading hooks, extra drive bands — whatever you’d like to have with you while you spin. A 1/3 broken twill makes this towel very fast and easy to weave“
I wanted to make a few changes. I kept the color schemes of dark and light (white warp, darker weft) but mixed it up a little with weft other than white for the pockets. I did not change the weave structure at all or the weight of the yarns to use.
  • The directions called for a floating selvedge — I have stopped loving this method and look for other ways to get a nice edge, SO I decided to add plain weave borders — 5 extra threads on each side. More about this later
  • The directions only called for a single pocket — which would show up on the dark side, I felt that each side of the lap towel should have its own pocket, so I adjusted the length of the warp to accommodate an additional pocket.
  • The directions did not do anything about the fact that the pocket was sort of a shallow, wide pouch — that would hang open and spill out your tools — I decided to put a decorative machine stitch down the middle and create 2 segments.

The 5/2 Mercerized cotton warp is wound, now it’s time to dress the loom.​

​What did I learn from my changes?

The Plain Weave Selvedge — plain weave and 1/3 broken twill do not play happily together.
  • I had to use 2 extra shafts for the plain weave borders.  It DID finally work out, but had to be tweaked a bit.  I had to adjust the shaft cords to get the correct height, since there were so few heddles on the shaft, and I had to put some weights on the shafts as well.  But in the end I was able to get good sheds.
  • The twill was too thick for the much thinner plain weave. The selvedge looked GREAT, but it wanted to fold, because of the thicker twill.  Ah well — after the first towel I removed the extra shafts, re-did the tie-up and cut off all but 2 edge threads on each side, these became floating selvedges.  Rats
  • After the next towel, I decided that the double thread was too much and changed to a traditional floating selvedge — using Asford’s floating selvedge system with LOTS of weights to keep it taut.
  • 1/3 Twill makes funky edges no matter what you do, so when I finished the towels I used some of the weft to do a hand stitched blanket stitch for the full length of each side.  I was very pleased with the result.
Double Pockets — this idea worked out great.  Now, no matter which side you are using, there is a pocket at the edge for your tools.  
The weave is weft faced and does make a “lap rug”.  It is thick and stays in place.  All in all — a good project with good results.

​A Gallery of Lap Towels

You can buy one at the Dakota Designs Shop. 

​Project #2 Swedish Towels

JoAnne Hall has a nice draft – available for Free for Swedish toweling, they are called Anna Towels. The project can be done in either plain weave, straight twill, broken twill, herringbone, goose eye, or 8 shaft block twill. I love the colors of white background with blue and yellow stripes.
anna-www-4pgs.pdf
File Size: 271 kb
File Type: pdf
Download File

HOWEVER, I really wanted to use 16/2 cotton instead of 8/2. This was an easy step outside the lines. There were a few adjustments to make.
  • 16/2 is approximately half the weight of 8/2 cotton. So instead of 20 epi, I would do 40 epi and the same would apply to the picks per inch. This makes it possible to determine the # of threads. 912 threads! Well, I’ve done a thousand threads before — there are time saving devices.
  • I decided to send to Vavstuga for an 80/10 metric reed. All my finer reeds are metric and the larger ones are Imperial — it just worked out that way. I would use 2 ends per dent — this gave me the 40 epi that I needed.
  • The directions are meant to go with a kit of pre-wound warp — so I had to make my own decisions as to how long to make the warp. I decided to go with 7 yards this will give me 7 + towels — each would be a few inches shy of 36 — due to the block structure 1.5″ for block #1 and .5″ for block #2 (these alternate throughout the towel) with 1″ on each end for hem. — it worked out to around 34″ per towel.

​Winding the Warp

I don’t know about you, but even holding two threads at a time, that’s 456 ends — lots of turns on the ole warping mill — with color changes! JoAnne has this neat trick. Wind both bouts at once, in one long warp. NOTE: this only works when you have a symmetrical warp order — or if the warp is all the same color/type.
  • Wind the warp TWICE as long with a cross at each end.
  • Put a guide string on (now for a 14 yard warp) and TIE ON the doubled warp yarn in the center of the guide string — Start winding.
  • All of the color changes occur at the center point.
  • When you have made 114 FULL turns (remember the warp is doubled) you will actually have two bouts that are connected (we’ll cut them apart) each with 456 ends (114 turns *2 passes/turn * 2 threads = 456)
  • Use Warp ties as usual, placing one VERY tightly on each side of the center mark. Get a helper and remove the warp. Have your helper hold the 2 crosses — on in each hand, while you find the center and CUT it.

​Color changes

The instructions have the warp color order — just double each color section and remember to ONLY go the the halfway point (remember you’re doing 2 bouts at the same time)
I did this with the 16/2 cotton and it worked so beautifully!

​Threading

I did the block threading, so there is block 1 and block 2. Again you double her instructions. If she says to thread block #1 1 time — you do it 2 times.

Keep TRACK of EVERY CHANGE

I have a notebook where I paste parts of the original instructions and my notes on the changes. I might want to reproduce the project at some point in the future.

The Moral of the Story?

Don’t be afraid to take a project and make it your own. Think about the directions, do they make sense for you? Is it using the warp you want (or have on hand)? It does take some planning, and some note taking, and a little bit of double checking, but in the end it IS worth it and you’ve taken that first step on a more creative journey.
0 Comments

Project Inspired Spinning

5/12/2019

0 Comments

 
Many times I find a really cool art batt, fancy hand-dyed braids, or batt in a braid — the colors or the texture attract me and I have to have it. What will I do with the finished spun yarn? Who knows! Many spinners ply their art just for the pure pleasure of it. There is always a place for indulgence spinning — it’s like eating comfort food, it just makes you feel good.
Picture
Periodically I spin for a particular project, something I want to weave or knit. How does one go about spinning yarn for knitting a sweater or a jacket? Several years ago, I wanted to make each of my sons a Tomten Jacket. I was inspired by some of the changes mentioned in a blog by Jared Flood. This was going to be a special project, and I wanted to add my own personal twist to it — spin the yarn myself!
There were a few considerations I needed to address first:
  • I spin VERY thin, the older I get the more like frog hair my spinning gets; funny, because years ago I wanted to make a sweater from Spin Off, which called for a thinner spun yarn, and I just couldn’t make it fine enough! For the Tomten Jackets, I decided to concentrate on spinning a thicker singles and do a 2 ply. I had PLENTY of roving, so if my yarn was still too thin, I could double the yarn.
  • Consistency is important. I concentrated on keeping my singles as consistent as possible. It is also important to WATCH the plying process — you don’t just want the singles to lay next to each other — they should be chasing each other around a pole!
  • When using Handspun, I like to find the right needle first. The knit structure was garter stitch, and I wanted it to be just tight enough to hold its own over time. I knit gauge swatches with several needle sizes until I found one that worked.
  • Once I had all my materials together, I really studied Elizabeth Zimmerman’s Tomten Jacket pattern from 2 of her books. My gauge did not match hers exactly, BUT this is a modular pattern, so making changes was effortless.

Here are some views of the Tomten Jackets.

Below are some of the details that I published in my project section of Ravelry. Zimmerman has you cast on 112 stitches, I was going to need a few more, but everything is divisible by 4 and 8, which is what you need.
  1. CO 136 Stitches
  2. Knit for 14” — around 50 ridges. (remember garter stitch grows, so you don’t need to make the thing over long) — you can work a few short rows on the BACK section to prevent ride up.
  3. Divide into 5 sections, Section 1 has 17 st and is one of the fronts, Section 2 has 34 st and is the ‘deep’ armhole (leave these stitches on holder until you are ready to do the arms) Section 3 has 34 stitches and is the back, section 4 has 34 stitches and is the other armhole, section 5 has 17 stitches and is the other front.
  4. Knit Sections 1,3,5 until they are the desired length to the neck, Zimmerman recommends that you knit twice as many ridges as you have stitches on sections 1 & 5 — this actually worked out quite nicely. I knit the back section up first, and then knit the two front sections to the same length .

My Schematic for the body of the tomten jacket.

Picture
​

What is next on the Docket?

Have you SEEN Knits about Winter by Emily Fodon? I want to made EVERY project in this book!
Picture

Barn and Soiree

Picture
Picture
​Several of the sweaters (Barn, Soiree) use DK weight — you can also use a Fingering weight with a strand of Mohair Lace. For me, Spinning DK means that I have to use a spin gauge. I looked up DK and went for 12 wpi – 2 ply. In retrospect, I should have CALCULATED the yards per pound of Emily’s DK, and spun it at 14 wpi. DUH, Slaps forehead. I now have almost enough of a middle-of-the-road DK — around 980 ypp to knit a sweater. Emily’s DK for Barn and for the DK version of Soiree is 1178 ypp — I’m off by about 15%. What to do?

Sierra’s “what to do” List

  • Do a gauge swatch. If I have to go down by more than 2 needle sizes, it will be TOO compressed. All the sweaters have LOTS of positive ease, so I don’t want too much yarn in the sweater, or it will be HEAVY.
  • If the swatch works out — then good — I’ll get started with Soiree. This sweater is smaller than Barn, so it’s a good first project.
  • If the swatch does not work out, then I’ll make a swatch that gives me the weight of fabric that I need. Then I’ll measure it and compare it to the sweater’s schematic. I had planned on making a size 3, but my swatch may indicate that I could just follow the directions and make one of the smaller sweater sizes, like the size 1 or the size 2.
  • If all else fails, I will knit the sweater in commercial yarn, to get a feel for what it should look like as a finished project, and to be familiar with the pattern. Then I’ll change the pattern, and knit a second sweater in my handspun.
The moral of the story is: there is no reason to give up just because you don’t get an exact match. There is always a work-around. Knitting with handspun is a magical, mystical process — it is WORTH the effort to make it work. I wasn’t even trying for a particular weight with the Tomten jackets. I just let the fiber dictate the thickness of the yarn, and made adjustments, like using 2 strands of yarn. Eleven years and a few repairs later, Nick’s Tomten jacket is still one of his favorite garments, AND it has kept it’s shape! SEE MAGIC! His dogs, Bear and Kaya, love it too.
Picture
0 Comments

Now that the DIRTY fleece is clean …..

2/26/2019

2 Comments

 
Picture
What can you do about those pesky specks of dirt and VM that are embedded in the fiber? Should you put it through the picker? Hand pick it? or give up in disgust!

Combing

…is always an option, and it will clean the fleece. You need a set of combs for that and a quick lesson on combing. I really like Susan McFarland’s combing video — it will work for all hand combs — If you have the large English combs, you need a different method. I keep my equipment simple these days — one set of combs that fits me well and doesn’t make my arms/wrists/elbows hurt — Can you tell that I’m getting OLD???
Not everyone has combs, or maybe you have a LOT of fleece and don’t want to prep it all by combing. I found a cool video one day called “No Fleece Left Behind” — it gives new life to fleece you had lost hope on! This video is SO well done and I have tried it and it really, really works — I wish I had known this a few years ago when I had a particularly tricky Tunis fleece to clean.

Using Carders

Recently I divested myself of all the extra fiber prep equipment. Sold the Picker, sold the Electric Drum Carder (the thing scared the beejeebers out of me!) and was left with 1 set of combs and 2 sets of carders. I decided that all I really needed to do was learn to use my carders more efficiently. I found a great video sponsored by Schacht and applied her suggestions right away. I carded up 8 ounces in record time! I couldn’t believe it.
I also bought a copy of the DVD “How to Card Wool, Four Spinners, Four Techniques”. I really enjoyed watching it . I am really encouraged about using my hand carders to prep my wool. Norm Kennedy advocates really SCOURING your fleece an then uses a few drops of Baby Oil before carding. I tried that too, and it really makes a difference — the fibers card up much more easily.

Sample It!

Now I am ready to try out 2 of the methods mentioned above. My Texel from Washing Day is ready for processing. I need to decide which I will use — Combing or “No Fleece Left Behind”. There are three factors to consider: Time, Waste, Spinability.
I picked out a MESSY sample to spin, figuring that it won’t get any worse than this. First I combed a sample. The fibers were longer and it combed up nicely. Just a few bits left behind in the dizzed nest of now very attractive fiber. Then I picked out some fiber that had a LOT of embedded VM in it and used the method from “No Fleece Left Behind” Amazing — ALL of the VM came out and was either in my lap or on the carders. I laid all the fibers out so that all the cut ends matched.
I spun the sample worsted. The nest spun out extremely well — more spinability on this method. The card prepped locks were cleaner and very spinable (I spin from the cut side to the tip). If I were pressed for time I would use the carders — I prepped the fiber more quickly with this method. If I didn’t want to have to think much while spinning, I would choose the combing method!
Please enjoy the photo essay below — complete with comments.
2 Comments

Washing Day or "get that dirty fleece clean"

1/31/2019

0 Comments

 
Picture
Left: unwashed Texel, Right: Washed Texel
​
I am crazy for wool. Love it to death. I have been known to nearly bury my face in raw fleece because the smell of fresh lanolin is total heaven! I don’t actually bury my face — there’s a lot of stuff in fleece which I’d rather not get that close to. But the smell of fresh, greasy fleece — ahhhhhhhh. You can’t get all that joy by getting prepped fiber.


I buy it raw, wash it, keep what I want/need (How much does one truly need? That’s a question for the ages). AND then put the balance in my SHOP — all clean and sparkly for spinners to buy and spin.

My first experience with washing fleece was a total disaster. It was free, unskirted (yep there were actually dingle-berries hanging off of it) and really, really, really greasy. Not a good choice for a beginner — I didn’t even have the sense to skirt it before trying to wash it. Long story short, it made great fertilizer tea.

Over the years, I have tried various methods to wash raw fleece, and even gave up for a while. Then I watch Judith Mckenzie’s Three Bags Full — I liked her method and made a few changes to suit my needs. The key?

​Wash in small batches — even if you have 9 pounds of it to do! I also employ a sort of conveyer line of pots for tricky, sticky, “oh my gosh there is a lot of grease” fleece. This might consist of as many as 3 successive wash pots and 3 successive rinse pots (that’s my secret to washing Merino and Cormo)

Materials Necessary

  • Pots — the more the better. Sometimes you only need 2 — I had 16 oz of Texel and 10 oz of Texel/Cotswold cross — so 2 BIG pots were fine. If you have really greasy fleece 2-3 wash pots and 2-3 rinse pots work better. Each couple of bags will go in the pots in successive order.
  • Shampoo for oily hair, I use Suave Clarifying Shampoo
  • Rubber Gloves (the water is too hot to immerse your hands in — and it is icky)
  • Lingerie bags (will easily hold 2-4 oz of Fleece) — I have at least 14 of em.
  • A way to spin out the rinsed fleece (washer or dedicated spinner)
  • A place to let the fleece dry — I use an Herb Drying Rack I found on Amazon.
So what did I do today? I collected my materials, filled a pot with HOT water and got started! Go through the picture gallery below and read the comments –Then I’ll make a few observations under the photo gallery.
Observations
​

I use a timer and don’t let the fleece go long — because the water will cool too much and I won’t get to do a second set of bags. The last thing you want to have happen is for the lanolin to re-deposit back onto the fiber. I have had that happen — then I have to start all over! Bummermissimo. I will sometimes “refresh” the pot with fresh hot water.
I do a successive sequence for really greasy fleece.
  • First wash pot — 2-3 bags in it. set timer
  • When timer is almost ready, fill second wash pot with water and put in shampoo.
  • Move bags into second wash pot and put 2 more bags into the first pot.
  • Repeat process for rinse pots.
0 Comments

When Weaving Doesn't Go as Planned

12/16/2018

0 Comments

 
Picture
You know how it is, right?  You have a grand plan,  for a weaving project, you spend time doing calculations, making adjustments, choosing the materials and the colors.  In your vision it is all perfect and everything works out like magic.
AND sometimes it really does!  The first time I made these log cabin towels (using the colors in the book of Black, unbleached, turquoise and burgundy) I had a warping disaster, chucked the entire mess and started over — Now THAT was a really bad day. This month when I tried it again, using my new Glimakra Standard loom, and all my own color choices, it worked like a dream, there wasn’t a single glitch — not one.
Picture
Picture
6 Log Cabin Variation towels — a perfect project!
I learned many things at Vavstuga for the 3 times I have been there.  One of the most important things I learned is that mistakes happen, find them, fix them and move on to happy weaving.  In each of these classes there were
  • Winding errors — the curtains where 5 vertical stripes of 3 threads were missing (I really wanted those stripes)
  • Threading errors — which is why I check and double check my threading — but still will get a crossed thread here and there
  • Sleying errors — either skipped dents or dents with too many and then too few threads
  • Edge issues while weaving — due to poor tension when beaming
  • and the dreaded Broken Thread!
I wanted to make some bread towels — gifts for Christmas, a few for me and a few for the shop.  I have admired these towels for a while on Ravelry and finally obtained Design Collection 16 — which has the draft and weaving instructions.  
Picture
The Darker Towels used a yellow for weft, the one on the right has the same stripe colors as the white towels, the one on the left has alternate colors for the stripe sequence.
Like my husband (the cook) I always follow the “recipe” the first time through.  The most I do is add yardage so that I’ll have a few items left to put into the shop.  My warping mill (thank you, thank you Paul) made by a good friend does 3.5 yards and this project called for 5.5  to make 6 towels.  I decided to go for 2 complete turns of the mill and 2 extra towels.  Just so you know THAT part worked out perfectly — I had 8 towels and some left over for my sample bin.

Problems?

There were a few winding issues.  I like to hold 2 threads, but the warp stripes were 2, or 3 — hmmm.  Those threads were held as singles, with lots of ties on the weaver’s cross side.  I double knotted them in paranoid frenzy.  In my zeal to make sure I had the right number of threads for each stripe, that I had KNOTTED them well when changing, I MISSED that there was ALWAYS a section of 3 unbleached threads when changing colors.  I was following the warp order chart carefully, which I had recopied to be larger so I could see it, had a missing section of white around the central stripe of brown. ​
Picture
You can see the Broken Thread fix — look for the near the lease sticks, and the Missing Warp Thread Fix — the Film Canister.
RATS!  I discovered this error after beaming, and before threading,  so I had to use the hanging film cans stuffed with quarters solution.  I used more quarters than I thought I should to give the right amount of tension — which, I have to say worked out very well.  I wound all three missing threads onto the cans, and aside from untangling them periodically, it was pretty hassle-free
Threading seemed to be going well and was easier than expected.  I found a “pattern” that I could follow. HOWEVER,  I misread the threading instructions and started in on the textured part too soon — 18 threads too soon.  The lace section of the towel is surrounded by a plain weave border.  I discovered this AFTER I had completed the entire center section — so — ripped it all out and started again.  This gave me time to REMEMBER how I should hold the threads while threading.  I had forgotten my training!  Becky has us hold a larger group of threads wrapped through the fingers of the left hand (with tension) so that it is easier to pick out the thread you want. You also use your left thumb and forefinger to help stuff the thread in the heddle. I was dickering around with putting 2 threads between each finger  and working that way — very slow and inefficient.  Rethreading was a good opportunity to recall my Vavstuga training.
Sleying was quick — I forgot to double check that I had not missed any dents, because I was kinda on a tight schedule to get the loom dressed and towels woven — never a good excuse.  Checking saves time, because fixing TAKES time!  Yep, you guessed it, there were a few sleying errors.  There was a missed dent on the right side of the work, which I caught while tying on.  BUT there was a more subtle error on the left side — 3 in one dent, 2 in one dent and 1 in one dent.  It’s supposed to be 2 in every dent.  I did not catch this until I was weaving and noticed an area that looked like there was a missing thread. 
Once I figured out what was going on:  
  • I use the temple to spread a tad more, finished that towel
  • wove about an inch of scrap
  • cut the towel off
  • used warp sticks to make 2 sheds and tied the warp sticks to the cloth bar. 
  • pulled the 3 threads and redistributed them to their rightful place 
ALL of that took more time than a double check while sleying.
At this point most of my troubles were over.  I was happily weaving away, trying to get my beat just right to make square towels when near the end of the 6th towel, I noticed a little snake in the warp above the fell line.  Hmm … that looks like a broken warp thread — RIGHT in the middle of the weaving.  It took a quick internet search to refresh my memory, but I put in the temporary warp thread, tied it at the back beam with the rest of the broken thread and moved on — this was the EASIEST and FASTEST fix so far!
I realize now that most of my troubles were preventable (of course!) but there were even clues that I ignored once the error had been made.  
The winding error was the easiest to detect while winding — the stripe sequence seemed different before the center section than after — STOP AND LOOK for the reason — because there is one!
The threading error was simple too — I was bundling in groups of 20 — count and see how it matches up with the threading diagram.
Of course the Sleying error was also simple — check check check.
BUT errors are not necessarily bad — I once heard a saying “we fail forward to success”  You can learn from errors and they make you better when you do.
Picture
0 Comments

When I Want to Spin Thin .....

12/3/2018

0 Comments

 
I use support spindles.  Yes it does take a much greater amount of time to finish a 4 oz skein of yarn using support spindles, but spinning isn’t exactly a race for the finish is it?


I experimented in the early days.  I tried Some Neal Brand Tibetan and Russian spindles, Bristlecone Goddess Spindles, and Glasspin Spindles.  I finally settled on Woodland Working spindles.
Picture
I had to find a spindle that worked with my right arm — many years ago I developed a problem called lateral epicondylitis in my right elbow and I have to be careful not to over work it.  I needed a light spindle with a decent sustain, but more importantly lots of twirl.
​This Neal Brand Tibetan spindle was a great spindle to learn on.  It kept going and there was plenty of shaft to wind on the fiber — I found that after about .5 oz of fiber it was getting a tad full — put I could push it to nearly an ounce.
  • Whorl – Bois d’are (osage orange)
  • Shaft – Mesquite
  • 1.0 oz, 28 g
  • 11” long
  • 1.75” diameter
  • Whorl to Shaft Density – 1.38

Picture
Picture
  • Whorl Spalted Maple
  • Shaft Spalted Maple
  • 0.9 oz, 25 g
  • 11 in long
  • 1.75 in diameter
I liked this Neal Brand Russian as well.  It spun like the dickens and was ALMOST the perfect weight for my spinning style.
Then I tried some Bristlecone Goddess spindles.  They were pretty neat.  I loved the curvy waist — I would start to pile on the singles just at that point.  They were a little more work to get sustained spinning, though and my hand and elbow started to complain.  I made some lovely yarn with them though before selling them back into the Ravelry Spinning community.
Picture
Picture
I had heard about Bristlecone Glindles (a spindle with a hand blown glass whorl) from my friend Talia and wanted to try one out, but they are HARD to come by.  So I tried another spindle maker which made Glass whorl spindles as well.  I found that they were just too heavy for me.  BUT I have to say, those glass whorls are pretty awesome.  Since they are glass, there is virtually NO friction, so spin, spin, spin is what they do!

What was I Learning?

Weight IS a factor, but SHAPE also has something to do with the overall spinning experience.  I gravitated to lighter spindles, so that when they filled up, they would not become unwieldy.
  
Then one day, while toodling around on Ravelry, I came across Woodland Woodworking.  I asked my friend Talia about them and wondered where I could buy one — Woodland Woodworking is SO popular that Carl (the spindle maker) has a weekly update and turns ON the shop at a specific time — within about 5 minutes — WHOOSH they are all taken!  Talia took pity on me and sold me one of her wand style spindles — I was immediately in love. 

I started looking for used Woodland Woodworking spindles on Ravelry and bought quite a few (4 bead spindles, 3 or so teacup spindles and a wand spindle)  I took careful measurements of these spindles and started working with them.  

I try to keep the weight around 20 grams.  One or two of my spindles are over 20, but they are what I call a pendulum style wand — the extra weight makes them spin better for a longer period – so as the spindle fills up with yarn, there is very little affect to the quality of spinning.  I only have a few spindles that are not wand spindles — They are lighter in weight (under 20 g) and have a low whorl to shaft ratio (1 or less) so they spin pretty much like the wand spindles. 
​
Carl uses Walnut, Maple (mostly) Purpleheart, Cocobolo, Flame Birch, Padauk, Holly, Ebony, Rosewood … and many other woods.  He carves, does pyrography, dyes shafts, and even paints small figures/shapes on his spindles.  As you can see below, they are something to behold.  Most IMPORTANTLY — they all spin well!
Picture
Left to right, 4 Pendulum style spindles, 6 Russian spindles, 2 Carved Acorn spindles, the Elder wand (carved), a Carved Pinecone wand, 2 Cauldrons, a barely visible Teacup, another Cauldron and an Owl
What kind of yarn do I make — well — very thin, but not just thin,  The yarn has an airy quality, like feathers.  There is enough twist to hold everything together, but the fibers are a little more loose, the result is a yarn that is ethereal, light, feathery — just a pleasure to touch and to look at.
It takes around 8 spindles to produce a skein of yarn.  I put around 0.5 oz of fiber on each spindle.  I could put more, but the extra weight on the spindle affects the twist, so I leave well enough alone and grab another spindle.
​

Why did I settle on Woodland Woodworking? ​

There were several reasons.  The tools are exceptionally well made and perfectly balanced.  I spend a lot of time spinning and balance is the key to a comfortable, issue-free spinning session.  These spindles are ALL wood, just wood, no polymer infusion to prevent warping — just the pure wood.  The maker chooses good stock and is a true artist.  If you EVER have any issue with his spindles, just email him and send them back (if necessary) — Carl will make it right.  How cool is that?  I love buying from one man shops – in this high tech, commercially controlled world — a single person, making a great product is well worth supporting.

It takes me a couple of weeks — spinning in 1 – 2 hour sessions to complete a skein of yarn.  It is a labor of love and it makes a fabulous skein of Lace to Cobweb weight yarn.  Sunflower (above) has 1536 yards — my highest to date.  I usually have a spindle spinning project running concurrently with other wheel based spinning projects.  It’s important to change up what you do with your body, to avoid repetitive stress injuries.
​
Explore spindle spinning — especially Support Spindles — the lack of gravity on the spinning single will give you a product that will astonish you!
0 Comments

Day 5 — First Day of WEAVING

6/22/2018

0 Comments

 
Picture
Becky came in the night before and did a little sample on all but the Rep Rug.  I walked around and took pics of all the samples.

She gave a quick lesson on bobbin winding — watch those angles on the linen pirns — too steep an angle from the end to the middle and the thread just starts to fall over — not good. She demonstrated using the shuttle, Throw, Tug, Droop, Squish, Smack — to tell you the truth (honest confession here), I’m only going to double beat on projects that REALLY need it — like the placemats, rug and Rosepath — all the rest – one beat’ll just have to do!

I started on the Goose eye placemats — on the prototype loom.  A temple is a MUST and had to be moved after about 8 picks  — which is better than having broken edge threads.  The warp is tow linen and it really made my sinuses miserable.  I won’t be using Tow anymore.
​
We were all weaving like weaver’s possessed.  I was hoping to be done by 4:00 pm but went to 5:30.  Looks like this’ll be a pattern (haha).  They are full sized projects — so we have to work hard!
If the body holds up and I finish each day — I’ll be pretty pleased.  At that point I’ll know that I’m one of the Masters of the UNIVERSE!
0 Comments
<<Previous

    Author

    Many know me as Dakota Skipper -- that's my Cowboy alias.  I LIKE to write and I like to share.  Please enjoy reading about my frolicking fiber adventures!

    Archives

    April 2020
    March 2020
    September 2019
    June 2019
    May 2019
    February 2019
    January 2019
    December 2018
    June 2018
    September 2017
    August 2017

    Categories

    All
    Fiber
    Fiber Prep
    Musing
    Spinning
    Travel Adventures
    Vavstuga
    Weaving

    RSS Feed

© COPYRIGHT 2015. ALL RIGHTS RESERVED.
  • Home
  • Shop News
  • Online Store
  • Shipping
  • Sheepskin
  • Spin!
    • Spinning Videos
  • Contact
  • Blog
  • Subscribe